Get started with webhooks
To enable early access to scheduled reporting webhooks, please get in touch!
Creating webhooks
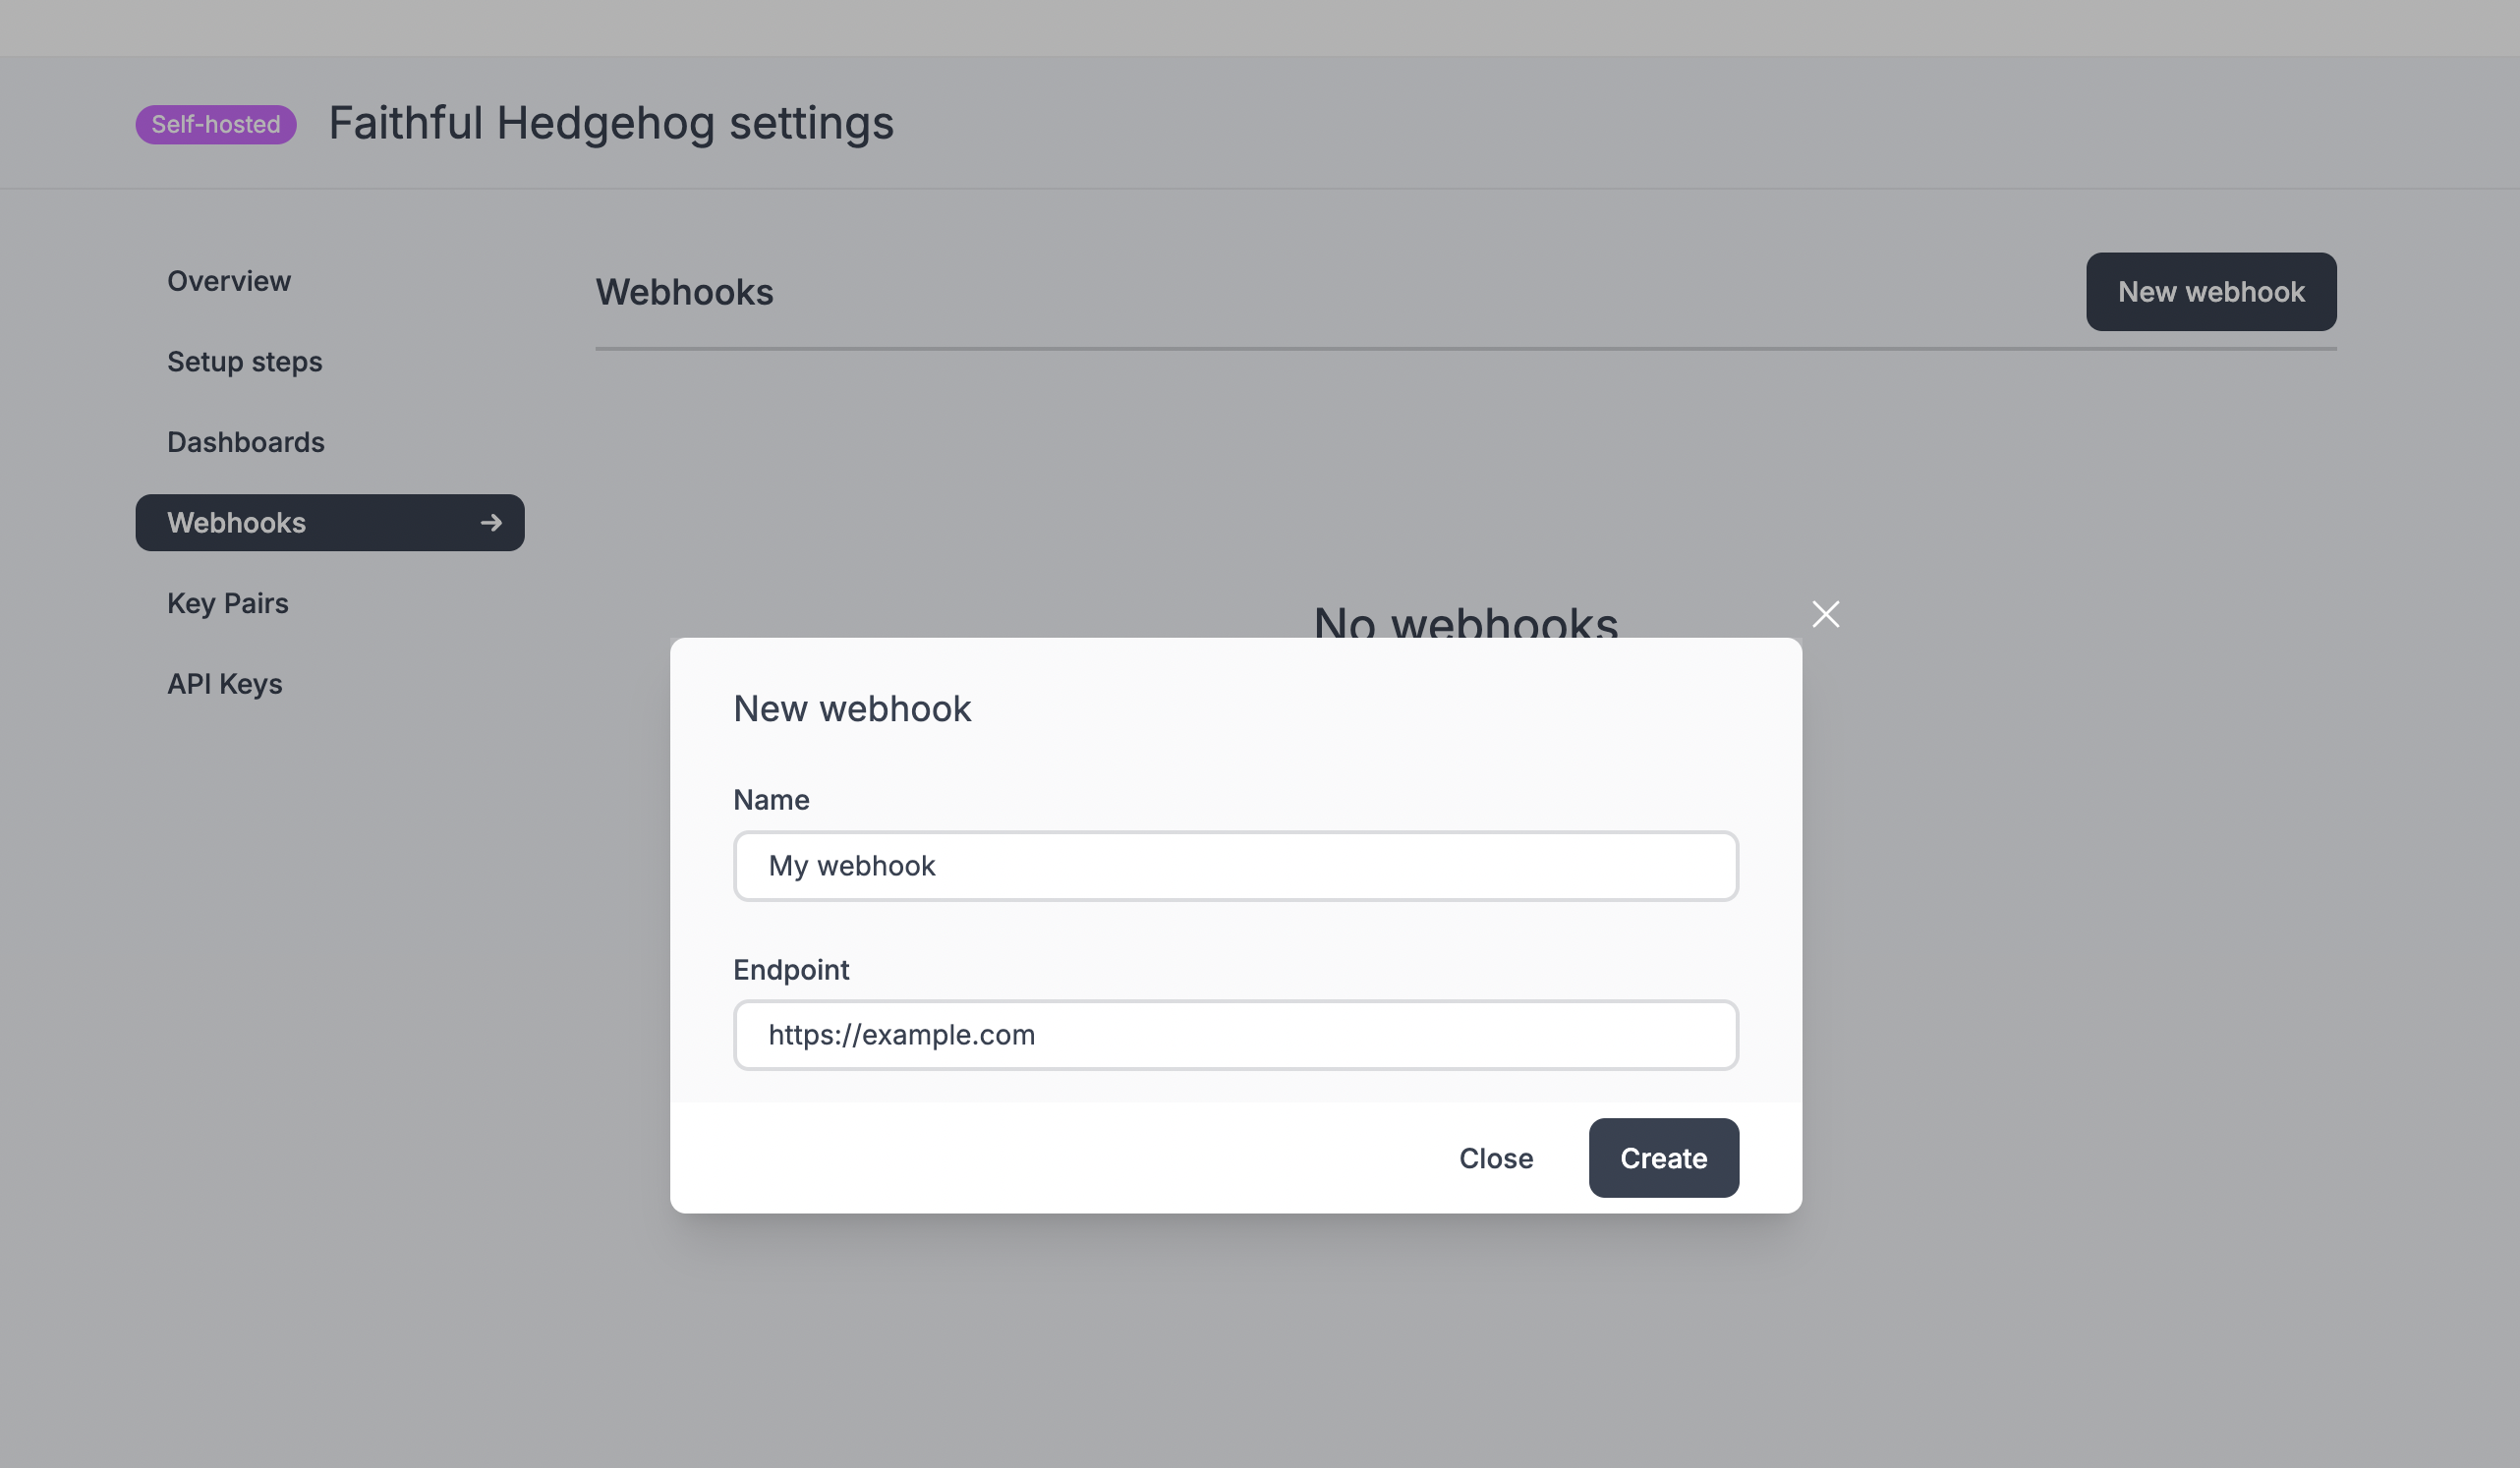
Create a webhook
Create your first webhook using the "webhooks" tab on your project.
Attach to a parent dashboard
Once you have a webhook, you need to attach it to the parent dashboard you wish to receive events for. This will affect all child dashboards too.

Add scheduling options
Scheduling options for a dashboard can be set using the reportScheduleOptions dashboard property.
Metrics
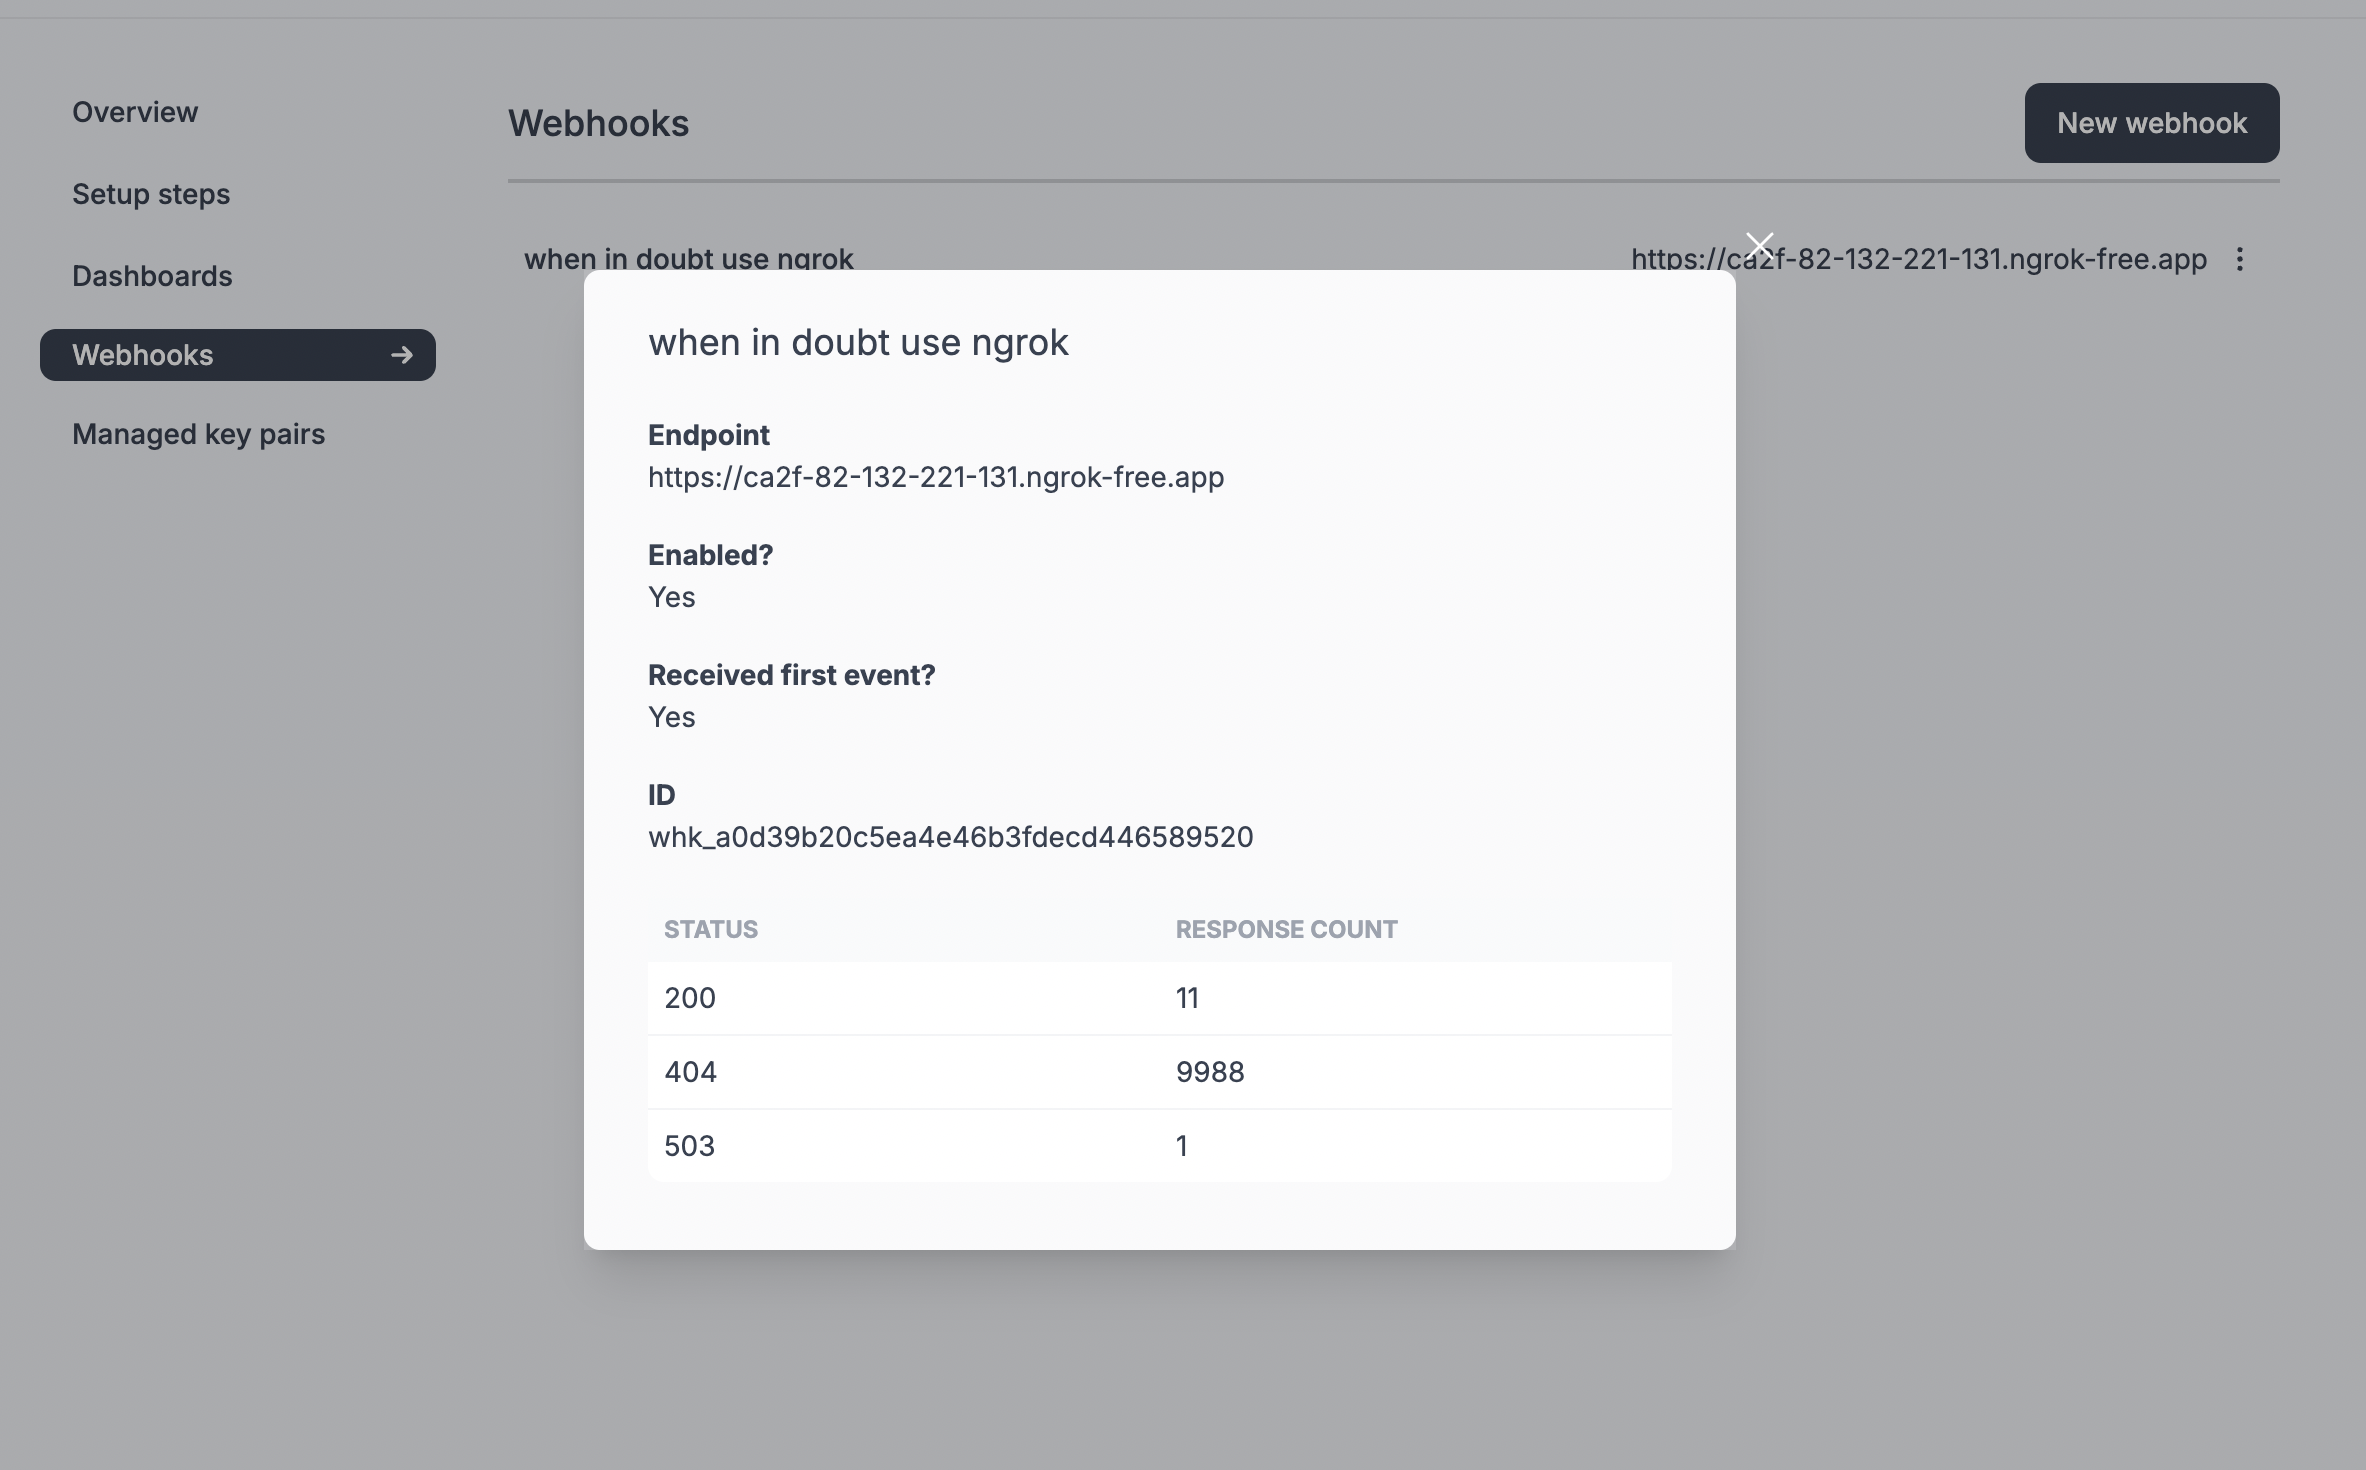
At any point, you can check the last 7 days of webhook statuses by opening up the "details" view of your webhook