Managing Environments
With Vizzly, admins can set up multiple projects for different environments. For example, if you'd like to connect to a staging database for testing, and a production database, follow the steps below.
How you manage environments depends on your project type:
Your project type determines how data is sent to Vizzly Dashboard. More about project types.
Self-Hosted and Managed Cloud Projects
This guide will show you how to set up 2 Vizzly projects, 'Staging' and 'Production'. 1 project for each database environment.
To get started, you'll need:
- A staging database*
- A production database*
*Make sure both these databases have the same schema.
Setting up 'Staging'
- Create a new Vizzly project at app.vizzly.co (opens in a new tab), we'll call this 'Staging'.
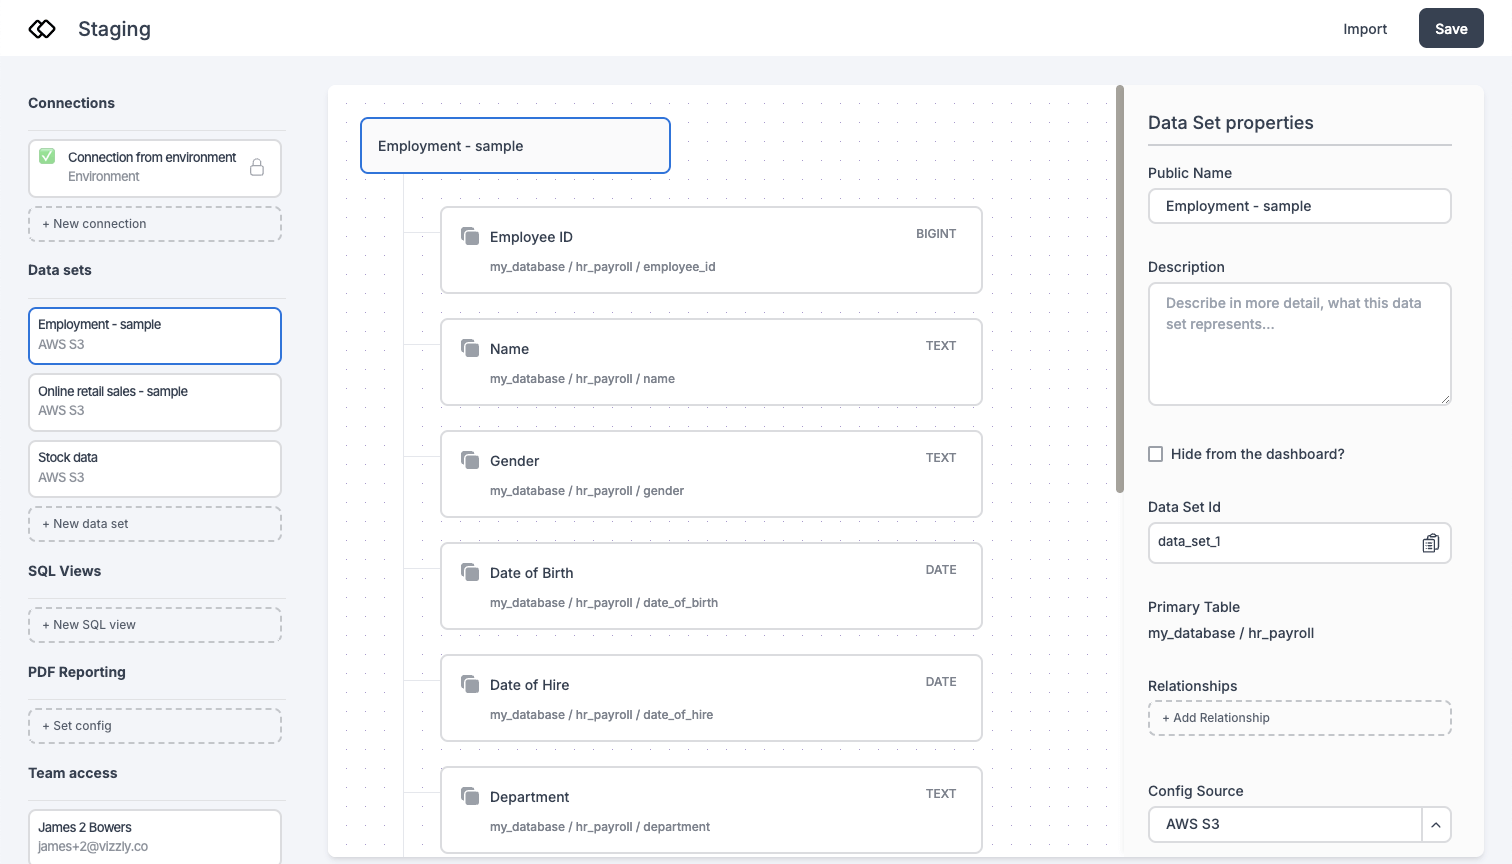
- Set up your Query Engine, and connect to your staging database.
- Next, set up your Dashboard component.
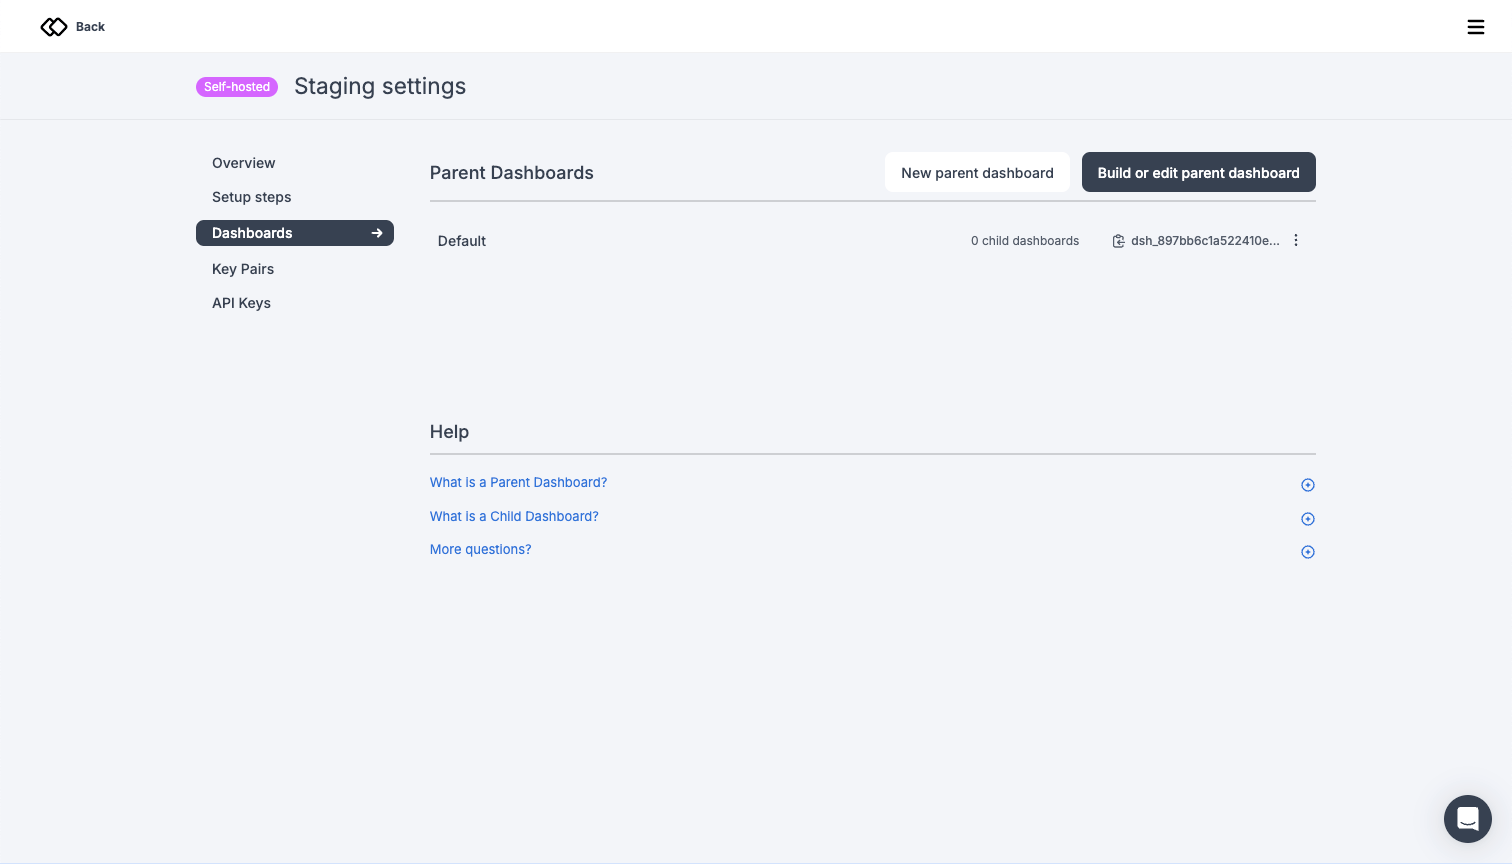
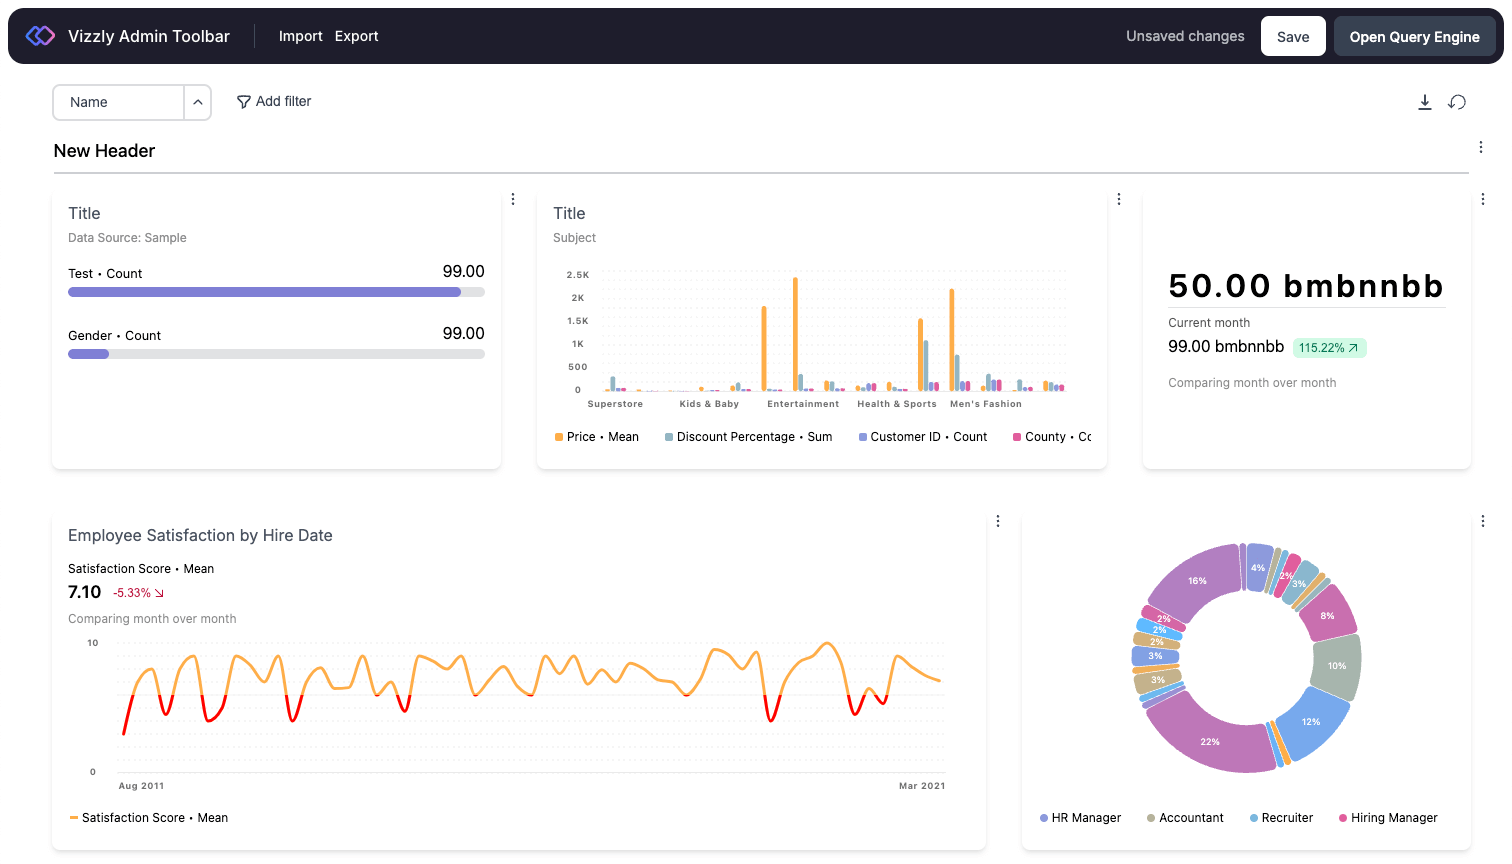
- To update your 'parent' dashboard', click 'Build or edit parent dashboard' on app.vizzly.co (opens in a new tab) within [Your Project Name] > Dashboards. This will show the Vizzly Admin Toolbar where your dashboard is hosted so changes can be saved.
Setting up 'Production'
Once you've added all your charts 'Staging' project Query Engine and Dashboard, you'll be ready to set up a production environment.
- Create a new project at app.vizzly.co (opens in a new tab) called 'Production'. Make sure you choose the same project type as 'Staging'.
- Set up your Query Engine, and connect to your production database.
- Export your Query Engine config from 'Staging' by clicking 'Save' in Query Engine UI. This will automatically download your config.
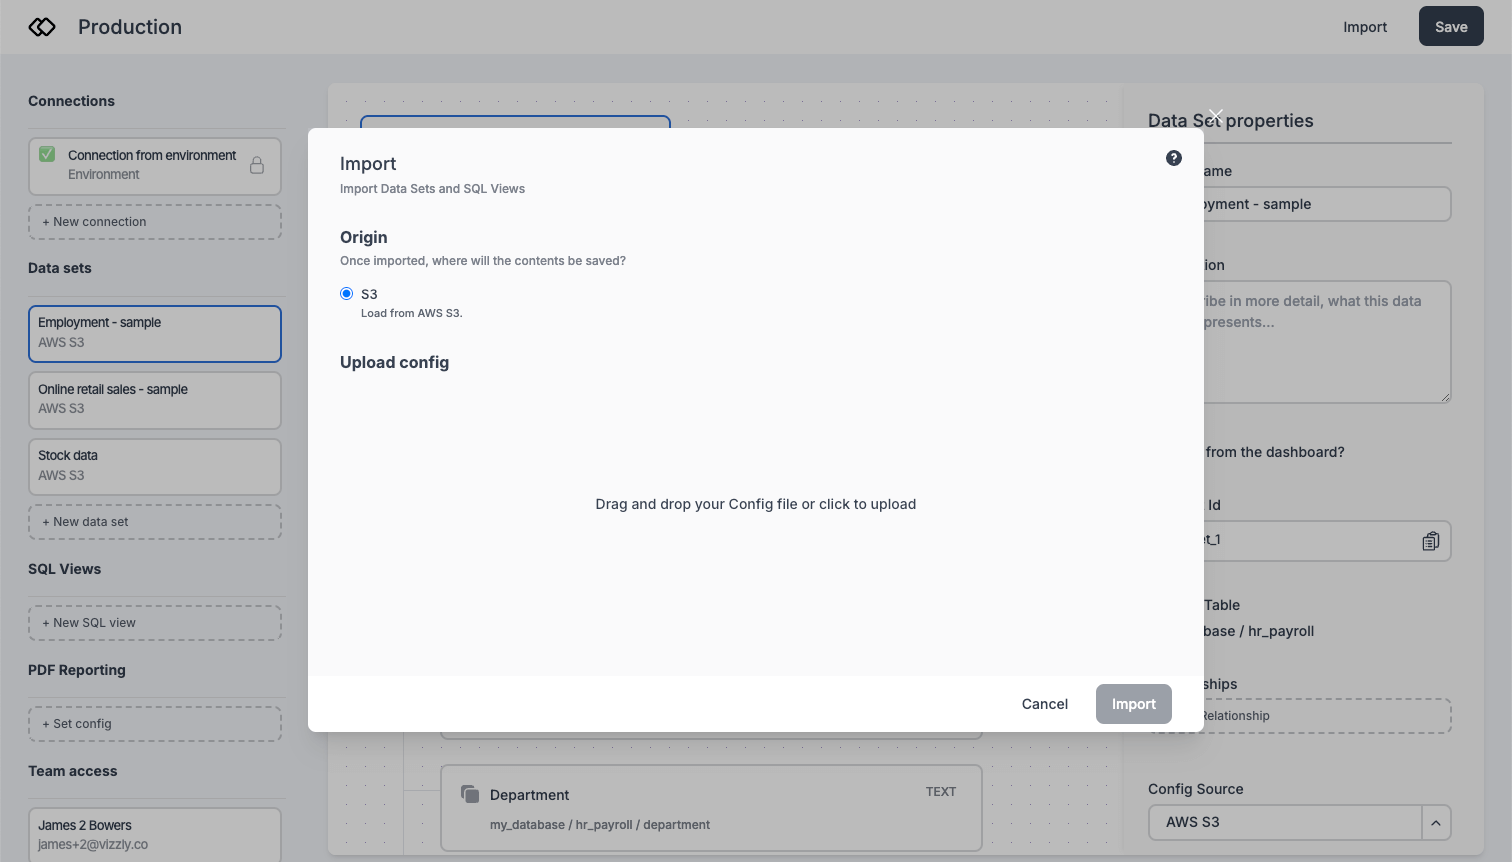
- Import your Query Engine config into 'Production' via the 'Import' button in the Query Engine UI.
- Click 'Build or edit parent dashboard' within 'Staging' > Dashboards on app.vizzly.co (opens in a new tab) and export your Dashboard config via the 'Export' button in the Vizzly Admin Toolbar.
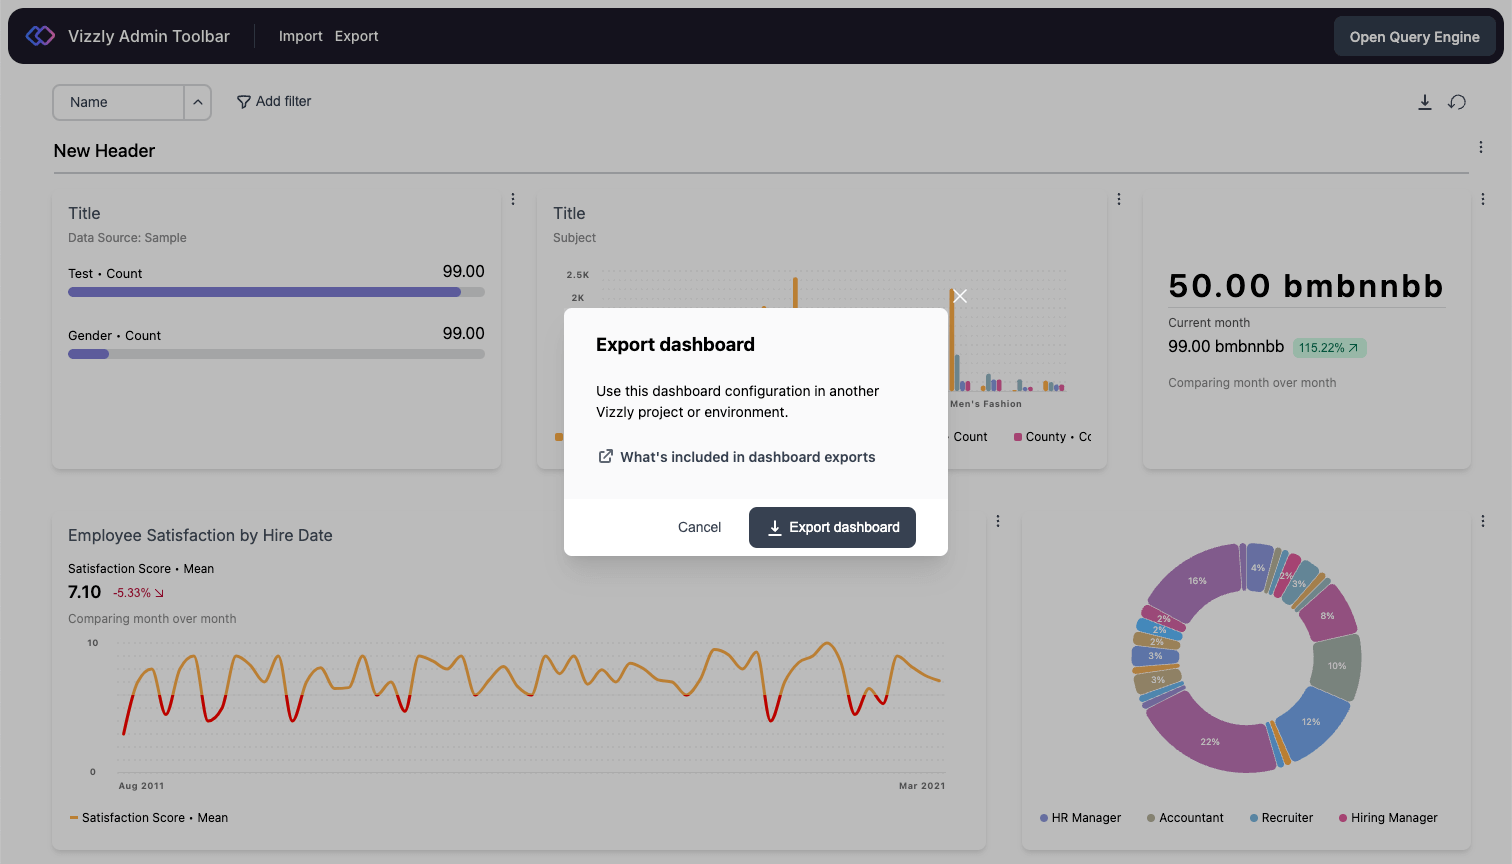
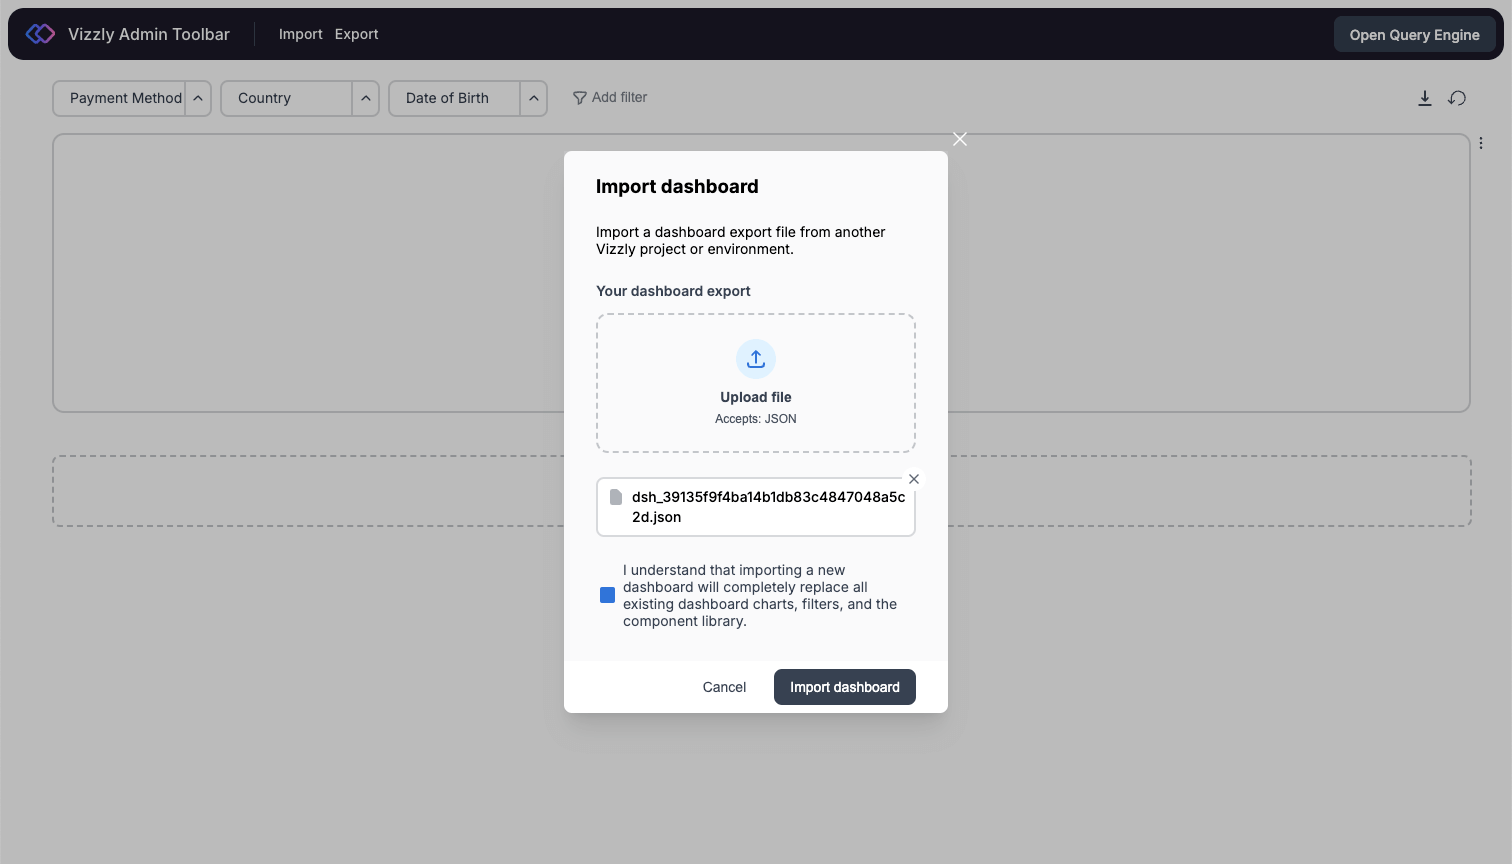
- Click 'Build or edit parent dashboard' within 'Production' > Dashboards on app.vizzly.co (opens in a new tab) and import your Dashboard config into via the 'Import' button in the Vizzly Admin Toolbar.
In-Browser Projects
In-browser projects use the Vizzly Dashboard Component and create an In-Memory Query Engine for data and data set manipulation.
This guide will show you how to set up 2 Vizzly projects, 'Staging' and 'Production'. 1 project for each database environment.
To get started, you'll need:
- A staging database*
- A production database*
*Make sure both these databases have the same schema.
Setting up 'Staging'
- Create a new Vizzly project at app.vizzly.co (opens in a new tab), we'll call this 'Staging'.
- Next, set up your Dashboard component.
- Configure the data and data sets you'd like to pass into your dashboard component. This can be done via the data and dataSets properties.
- To update your 'parent' dashboard', click 'Build or edit parent dashboard' on app.vizzly.co (opens in a new tab) within [Your Project Name] > Dashboards. This will show the Vizzly Admin Toolbar where your dashboard is hosted so changes can be saved.
Setting up 'Production'
- Create a new project at app.vizzly.co (opens in a new tab) called 'Production'. Make sure you choose the same project type as 'Staging'.
- Click 'Build or edit parent dashboard' within 'Staging' > Dashboards on app.vizzly.co (opens in a new tab) and export your Dashboard config via the 'Export' button in the Vizzly Admin Toolbar.
- Click 'Build or edit parent dashboard' within 'Production' > Dashboards on app.vizzly.co (opens in a new tab) and import your Dashboard config into via the 'Import' button in the Vizzly Admin Toolbar.